

How To Create A Timeline Powerpoint
A timeline is a representation of information that can be used in history, paleontology and any other study that requires visualization of sequential elements. It usually represents a horizontal line with segments of time. Each segment can have its own sub-elements. In this article, we will learn how to create a timeline in PowerPoint that represents the Phanerozoic Eon of Earth for Paleontology class.
Check out an easier way to create interactive timelines
1. Get Started
- Create a new PowerPoint presentation or open an existing one. Right away, you can apply a custom Theme that reflects your style via the DESIGN tab.

- Then go to the INSERT tab and click on SmartArt.

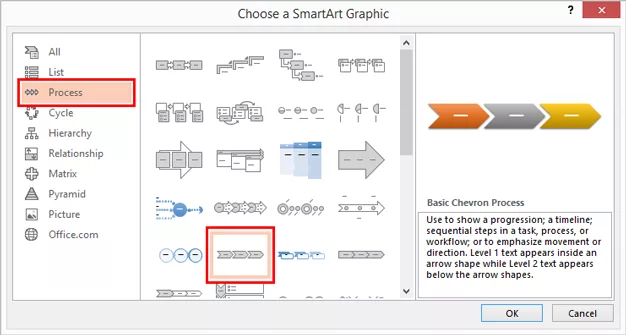
- Select Process on the left and pick the design of the timeline you like in the central pane. Then click OK.
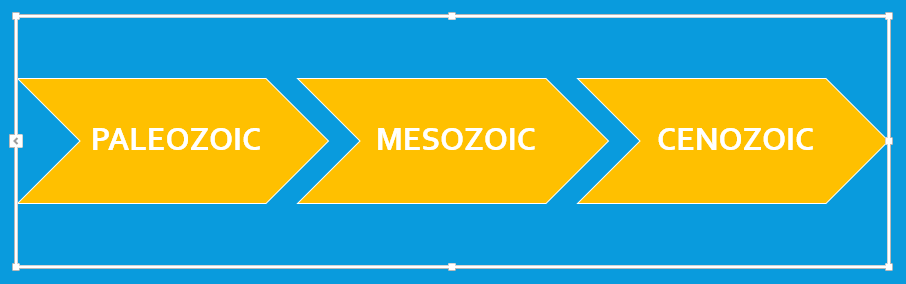
- The timeline will be created with three elements. Name them according to your topic.
- Fill in additional text for your Timeline. If you need to add more sections to your timeline, click Add Shape on the top panel. You can also Add Bullets to your sections.
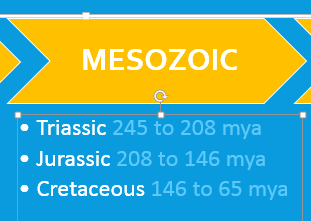
Bullets will be placed vertically underneath the selected section.
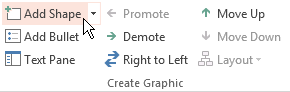
Familiarize yourself with using the Text Pane to fill in text of your timeline more conveniently.
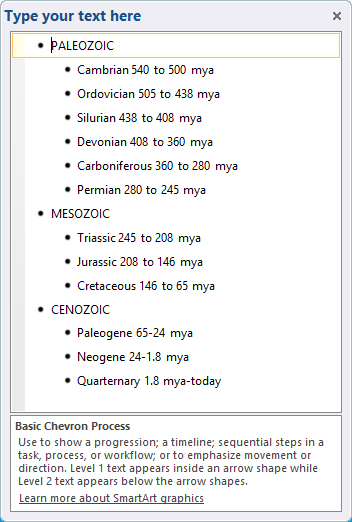
- Complete filling out, set custom fonts (Calibri for bullets), resize elements and change shape colors (FORMAT tab > Shape Fill).
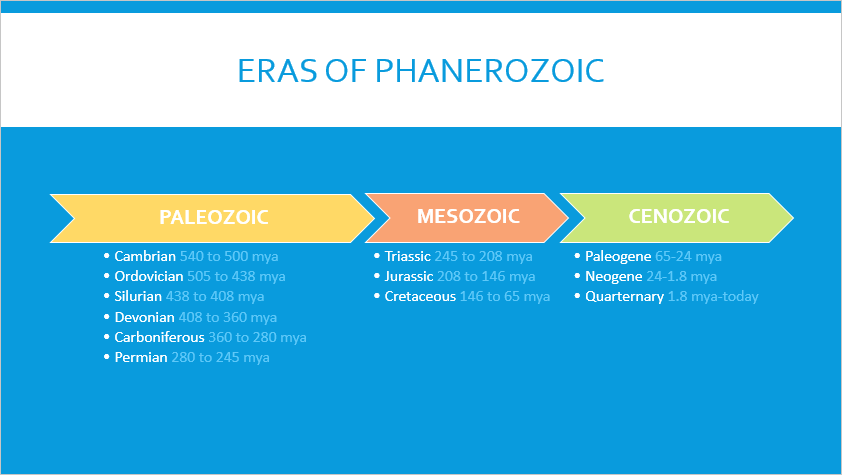
Awesome! Your timeline already looks pretty good inside PowerPoint. We just have to make it interactive by adding some links and animations, and then publish it to a Web format so students can access it online.
2. Add Links and Animations to your timeline
Here is an important point: we will have to break up our SmartArt into shapes to prepare it for conversion, fine tune links, and set custom animations. Therefore, we recommend that you make a copy of your original SmartArt in case you need to change it or create another timeline like this (using convenient SmartArt Format tools).
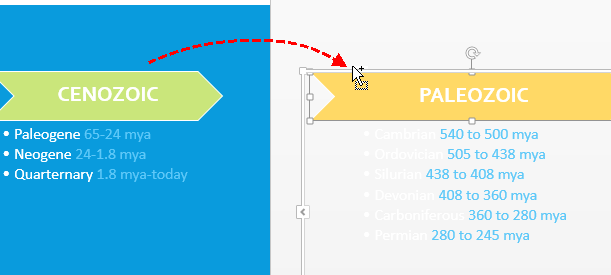
- To copy your SmartArt, just drag it by its border while holding the Ctrl key on your keyboard. Drag and drop the copy of the original Smart Art outside the slide.
- Then right-click on the border of the SmartArt that's on the slide and select Convert to Shapes from the dropdown menu.
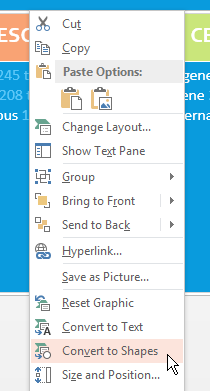
- Right-click on the border of this shape and go Group > Ungroup.
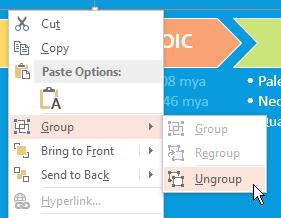
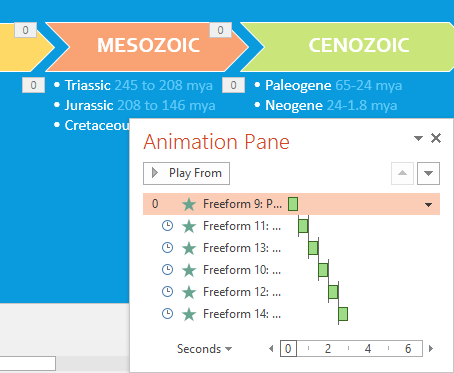
- Select each form individually and apply the Wipe animation. Set Start: With Previous for the first animation and After Previous for all the rest. Set effect options From Left for the horizontal timeline bar and From Top for the bullets.

After you apply all the elements, the Animation Pane should look like this:
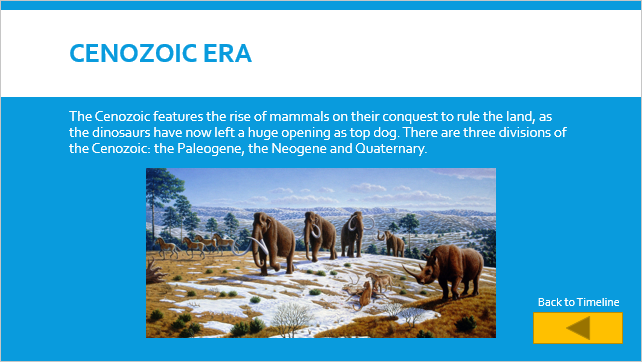
- Create slides for each Era; e.g., this slide is about the Cenozoic Era.
- Create an action button by going to INSERT > Shapes > Action Buttons.
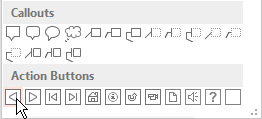
- Draw it on the slide and set Hyperlink to: 2. Eras of Phanerozoic, which will open the slide with the timeline again.
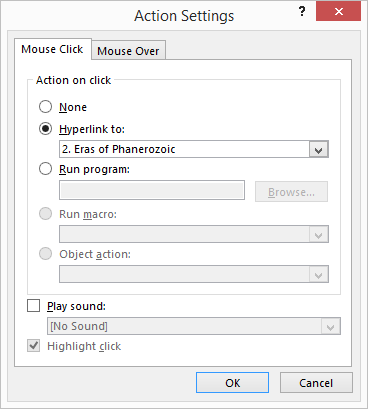
- Copy this action button to every slide so a learner can go back to the timeline from any descriptive slide.
After everything is done, the presentation will look like this in Slide Sorter VIEW.
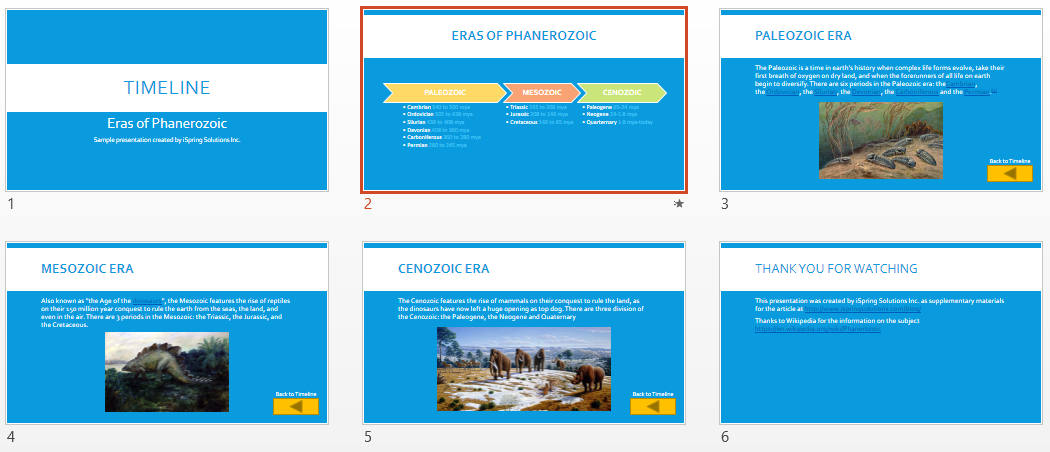
3. Share Online
You don't need any additional tools to create this interaction in PowerPoint, unless you are not planning to deliver it to anybody online. If you would like to share it on the Web, it will be a great help to use iSpring PowerPoint-to-HTML5 conversion facilities.
You can play around with this interaction or compare your result with ours:
Download our free Timeline template (.pptx, 0.7 Mb)
How to create a timeline faster
There are many benefits of creating your timeline using PowerPoint. You can determine any structure and depth you like, create custom element shapes, colors, animations, etc… Literally, you can create any design you want using just PowerPoint functionality. However, as you can see from this article, it is a pretty creative, complex, and therefore time-consuming process. There is a much simpler way of doing it (though with less freedom of customization).
iSpring Suite has a component called Visuals that lets you create a timeline interaction very quickly with almost no effort! It has a very easy-to-use editing window:
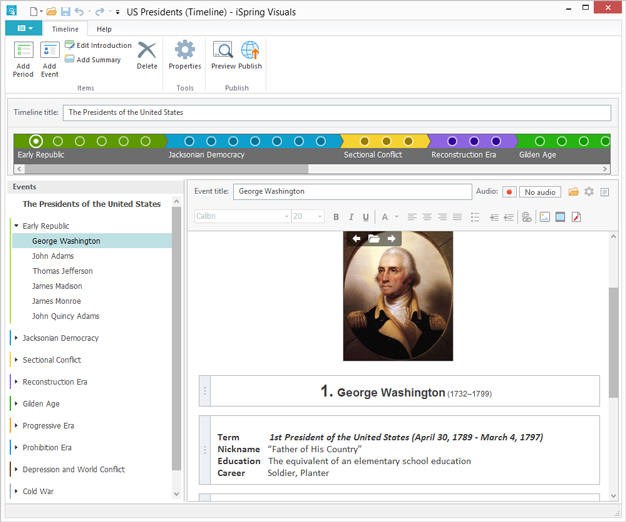
Basically, it has just 2 levels: Periods (colored sections) and Events (dots). You can add any information in the Event window, including pictures, sound, audio, video, etc. The interaction properties window is succinct, and allows you to adjust fonts and color scheme.
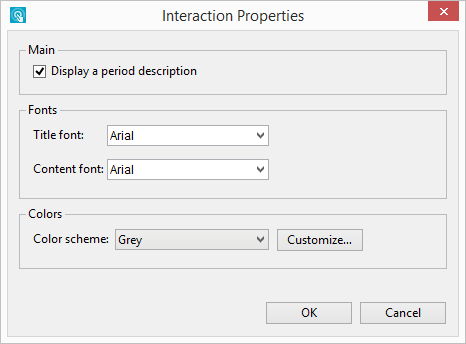
By clicking Customize in the Interaction Properties window, the new window will pop up. You can apply custom colors to the bars and the background of the interaction.
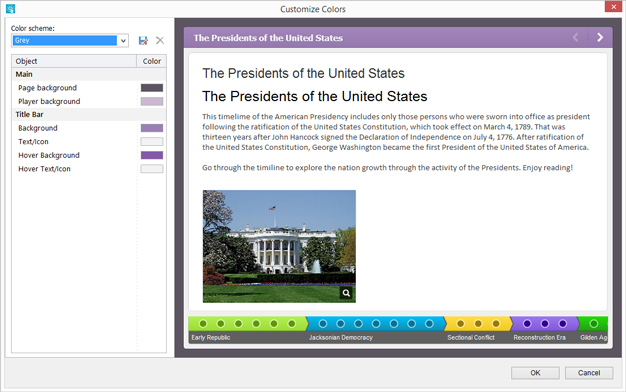
Check out this historical timeline created with iSpring Suite:
To see how we created this timeline on the presidents of the USA, read this article.
Which of these ways to make a timeline did you like most of all? Share your opinion in the comments below!
If you liked the article, please let us know by clicking theShare button.
If you have any ideas what kind of e-Learning topics you'd like to see discussed, feel free to leave a comment; we're always happy to write new content for you.
How To Create A Timeline Powerpoint
Source: https://www.ispringsolutions.com/blog/how-to-make-a-timeline-in-powerpoint
Posted by: walkerwittaloo.blogspot.com
0 Response to "How To Create A Timeline Powerpoint"
Post a Comment